How to create an Addon-domain in cPanel?
-
 Castor
 - 02 Sep, 2023
Discover the step-by-step process of creating an addon domain in cPanel. Effortlessly manage multiple websites within a single hosting account for efficient web administration and development.

Steps to Add a new Addon domain in cPanel
To create an addon domain in cPanel, you’ll need access to your cPanel hosting account. Here are the general steps to create a subdomain:
Accessing cPanel
Log in to your cPanel account provided by your hosting provider. This is usually done by visiting yourdomain.com/cpanel or yourdomain.com:2083 or through your hosting provider’s control panel.
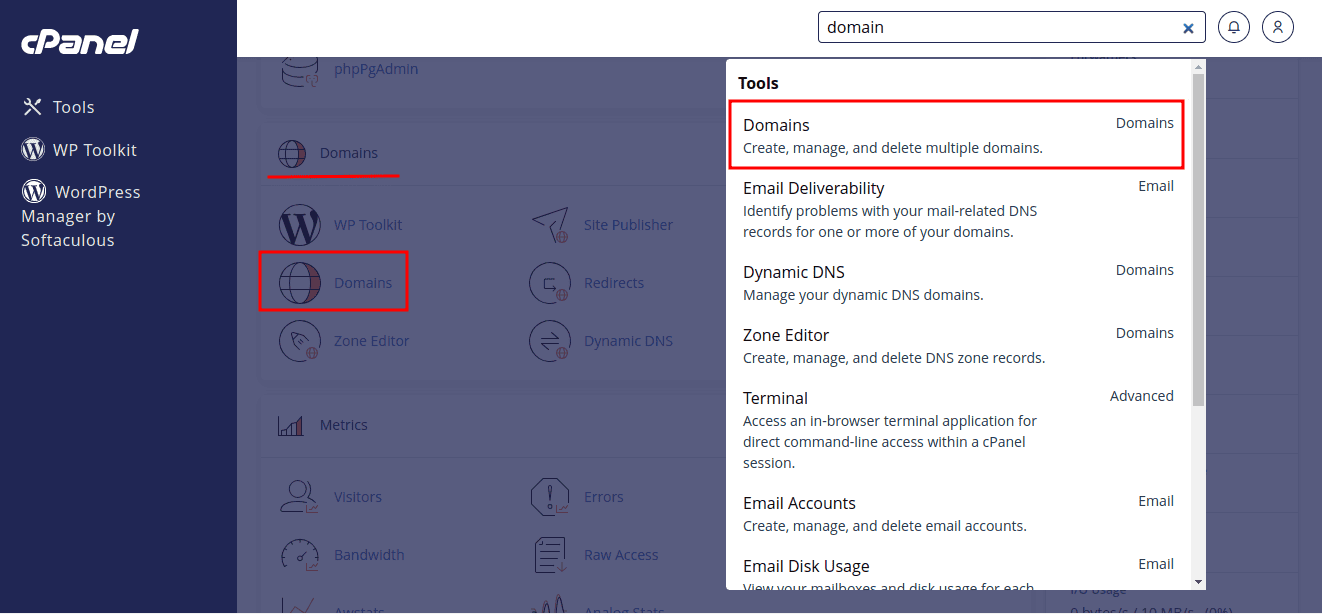
Locate the Domains Section
Inside cPanel, you’ll find various sections and icons for different functions. Look for the Domains section, which is usually located near the top or under the Domains category. Click on it to open the domain management page.
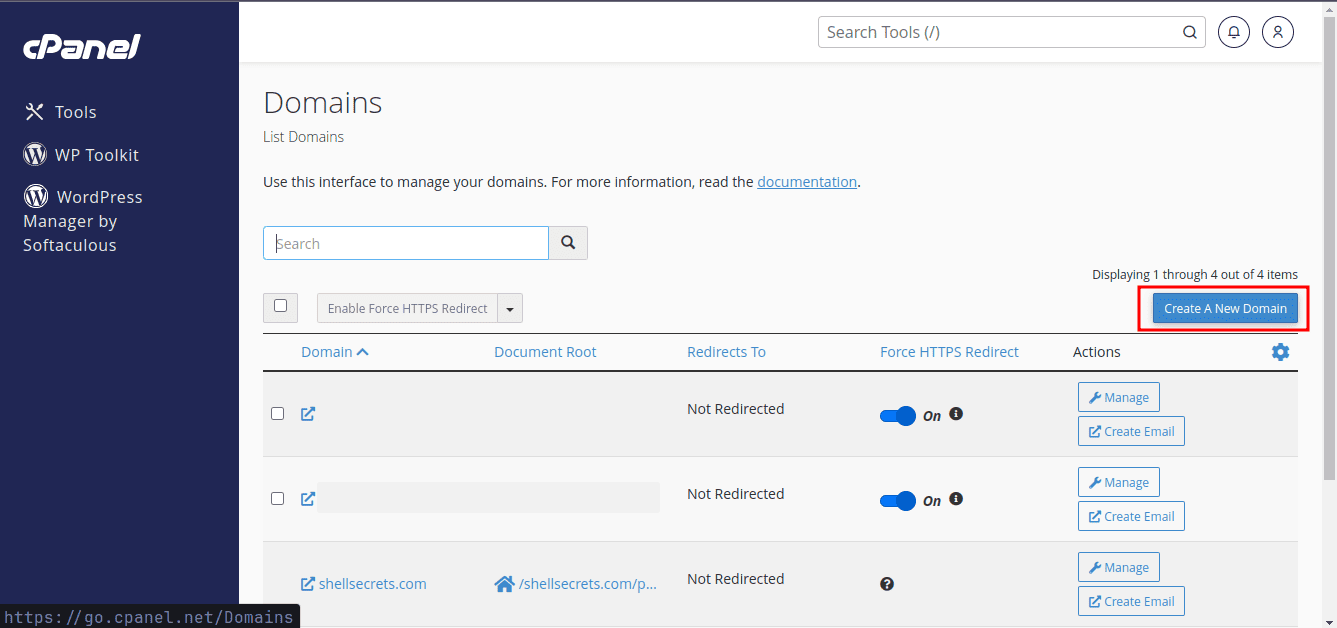
Create the addon domain
Within the Domains section, you have the capability to initiate a fresh domain by selecting the Create A New Domain option. This enables you to seamlessly add a new addon domain to your system.
Now, you’ll be required to input your addon domain name, along with specifying the document root where the files for the added domain will be stored. Please ensure that you uncheck the Share document root… option if you intend to use a separate folder for managing the website files of the addon domain. If you leave it checked, your addon domain will display the same content as your primary/main domain. You have the option to either leave the document root directory as the default setting or specify a different location if necessary.
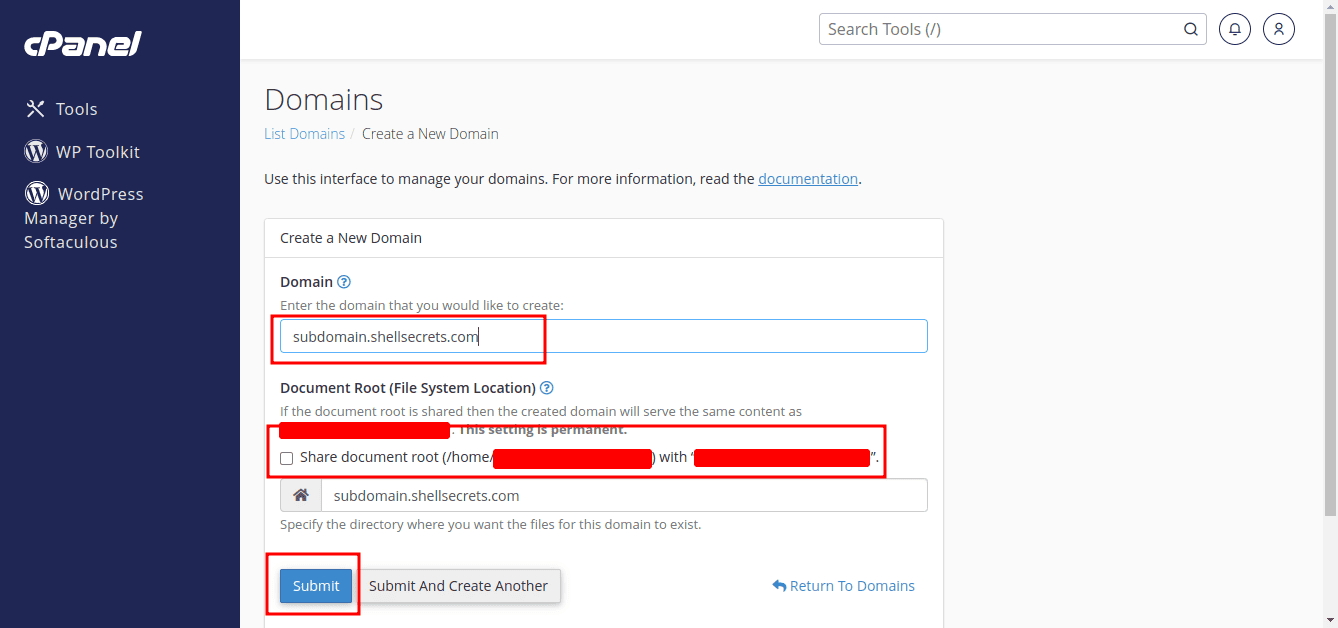
Once you’ve filled in the details, click the Submit button. cPanel will then add the new domain for you.
Important Note:
- Make sure that the namservers/DNS for the domain are pointed correctly to the hosting account.
- If you’re using cloudflare/netlify or any other DNS management system, you’ll need to add the A/AAAA records for your domain in the their DNS management.
- Please note that the exact interface and options may vary slightly depending on your hosting provider and the version of cPanel they are using. If you encounter any difficulties or if you are unsure about any step, consider referring to your hosting provider’s documentation or contacting their support for assistance.
Verify the domain
After creating the new domain, you should see a confirmation message. You can now access your addon domain by entering the full URL in a web browser (e.g., youraddondomain.com).
Also Check:
Conclusion
In conclusion, mastering the art of creating an Addon-domain in cPanel is a valuable skill for anyone managing multiple websites within a single hosting account. With the straightforward steps we’ve outlined, you can effortlessly expand your online presence, enhance your web management capabilities, and unlock new possibilities for your online projects. Whether you’re a seasoned web developer or a beginner, cPanel’s user-friendly interface empowers you to take control of your web hosting environment. So, don’t hesitate to explore the world of Addon-domains in cPanel and watch your online ventures flourish.